How to bind Google Authenticator?
Binding Google Authenticator can improve the security of your account. This article will show you the process of binding Google Authenticator.
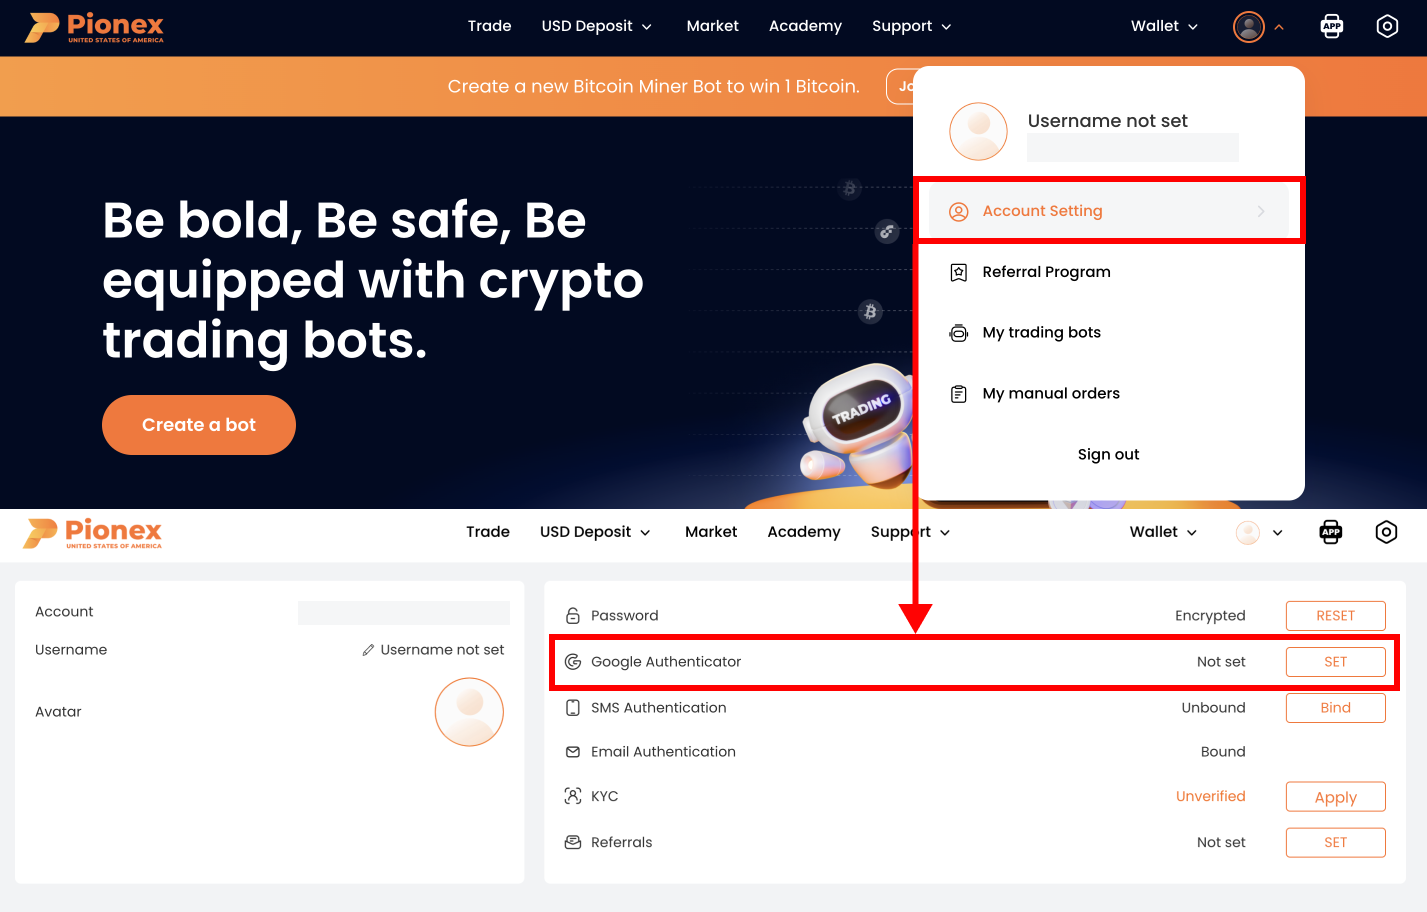
App operation step
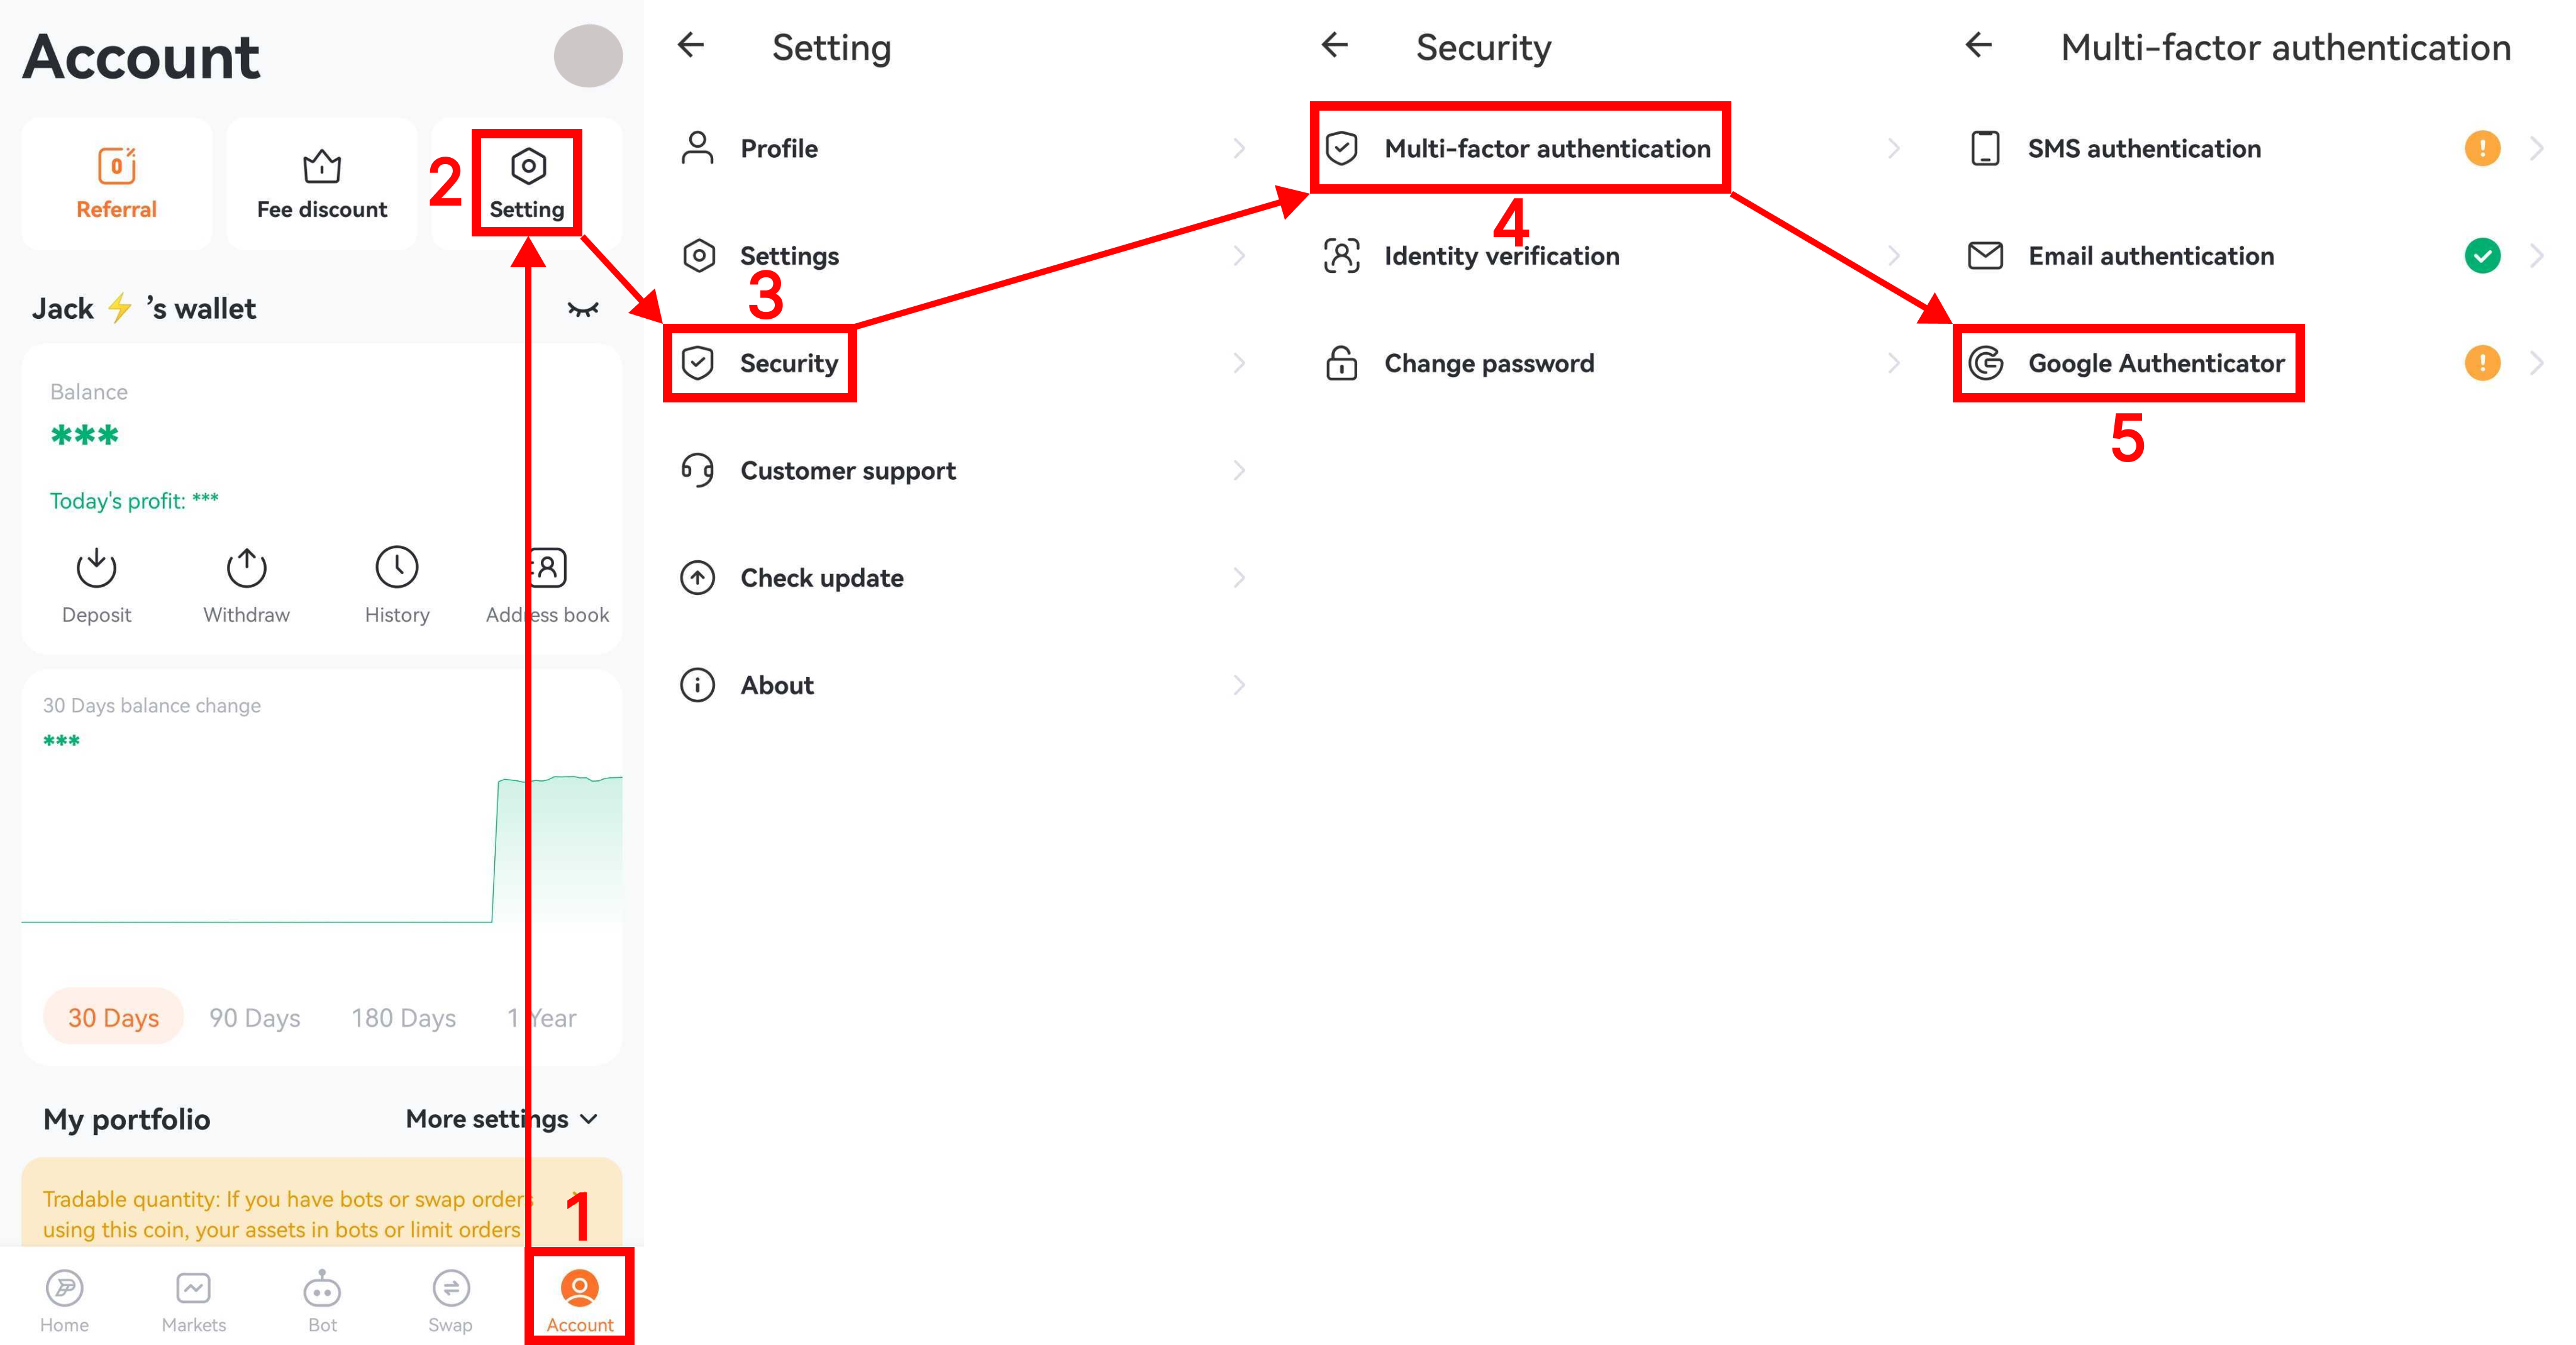
1. Click the buttons in the order shown in the picture to enter the Google Authenticator binding page.
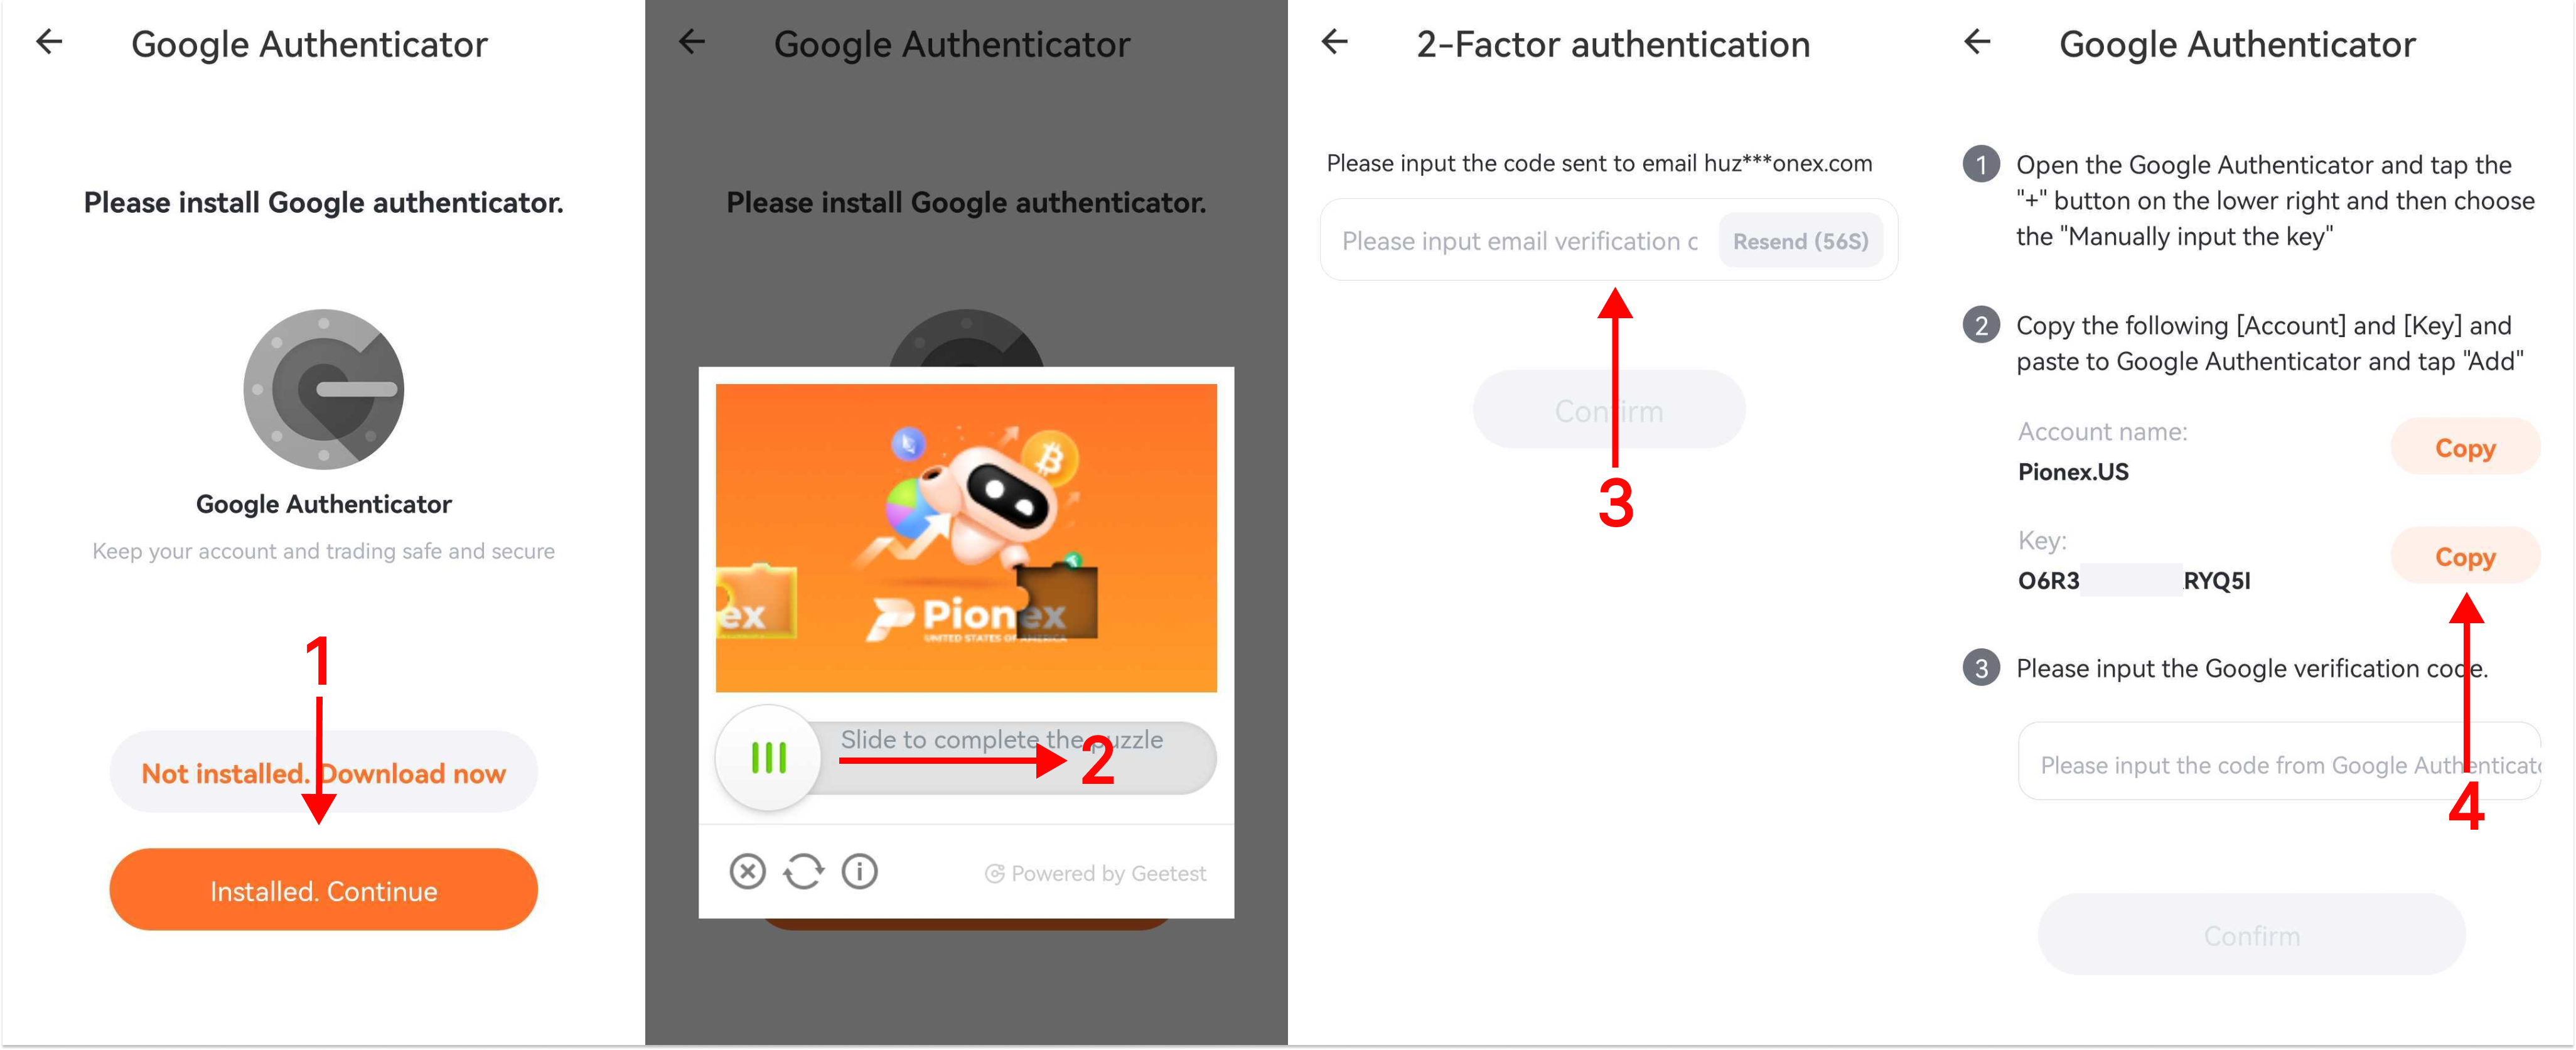
2. If you have not downloaded Google Authenticator, you can click “Not installed. Download now” to download it; if you have downloaded it, please click “Installed. Continue”.
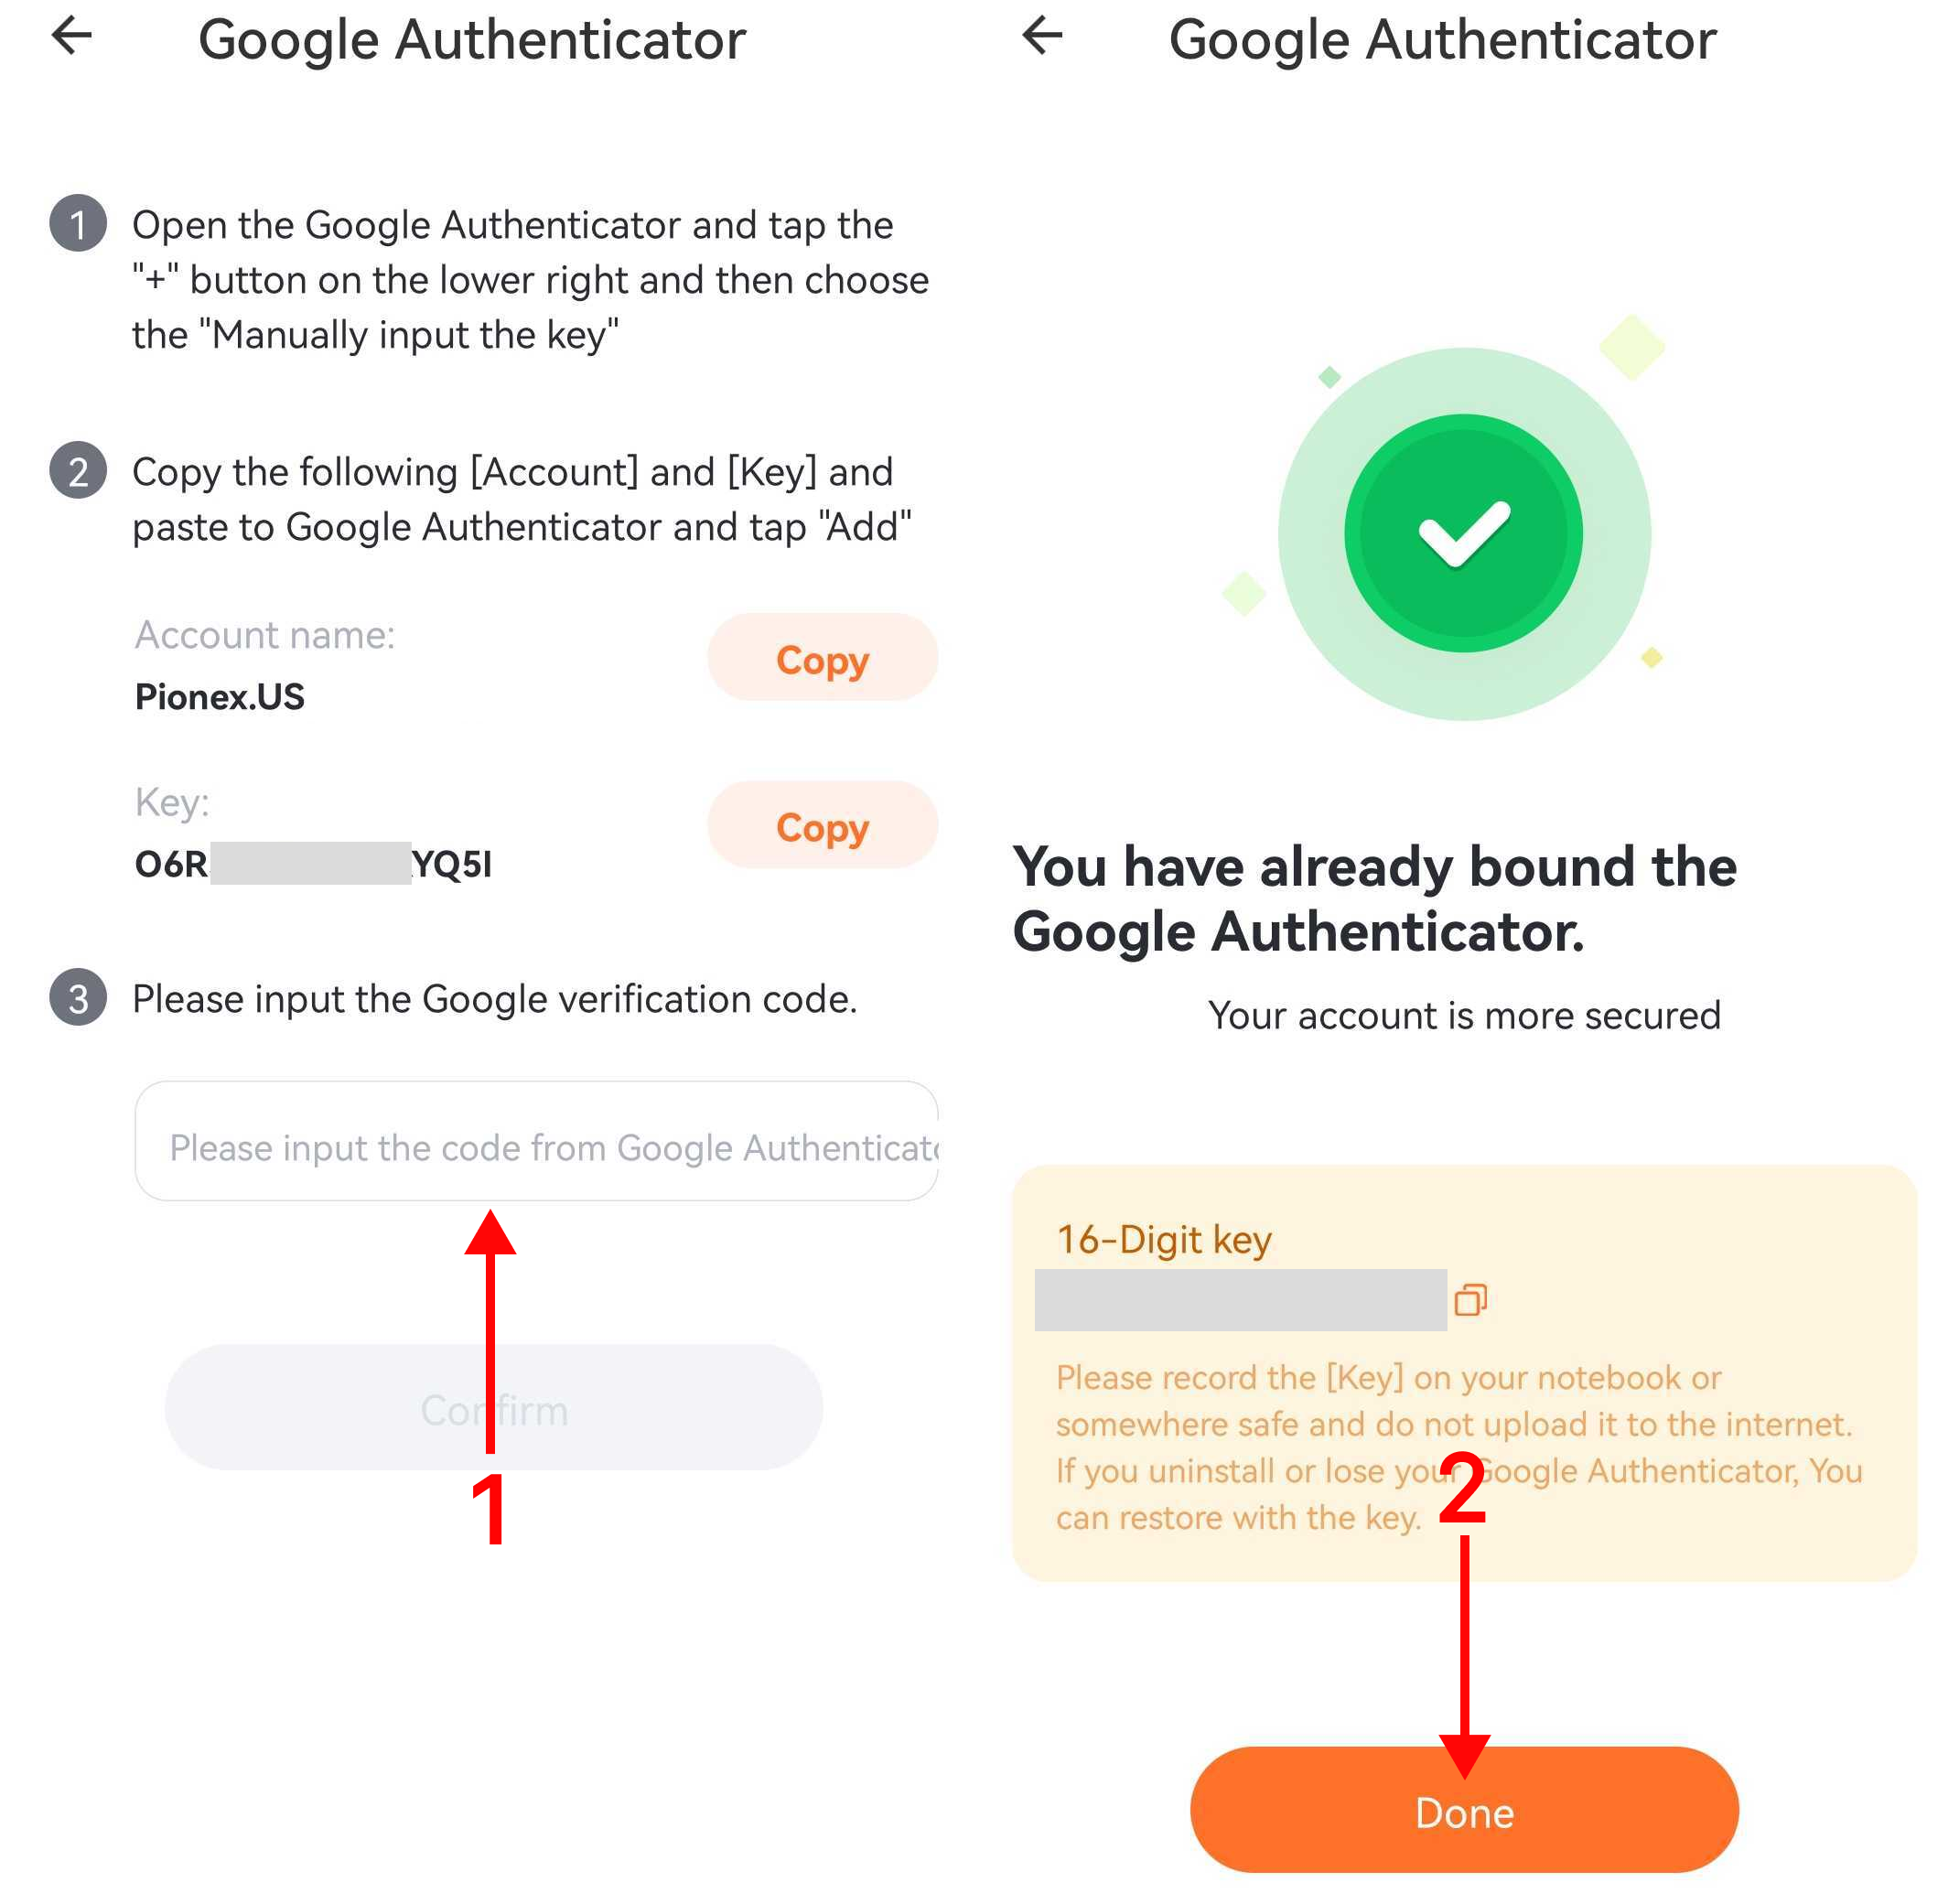
Then drag the slider to verify, and enter your SMS verification code/email verification code to confirm. After entering the new page, please copy the “Key” here (“key” is equivalent to a string of passwords, please do not leak it to others).
The account name does not need to be copied, as you can set it to your liking.
3. Open the Google Authenticator you just downloaded and click the “+” – “Enter a setup key” button. After entering the new page, please set your account name and paste the key you just copied into it, and finally click the “Add” button to generate a 6-digit Google verification code successfully.
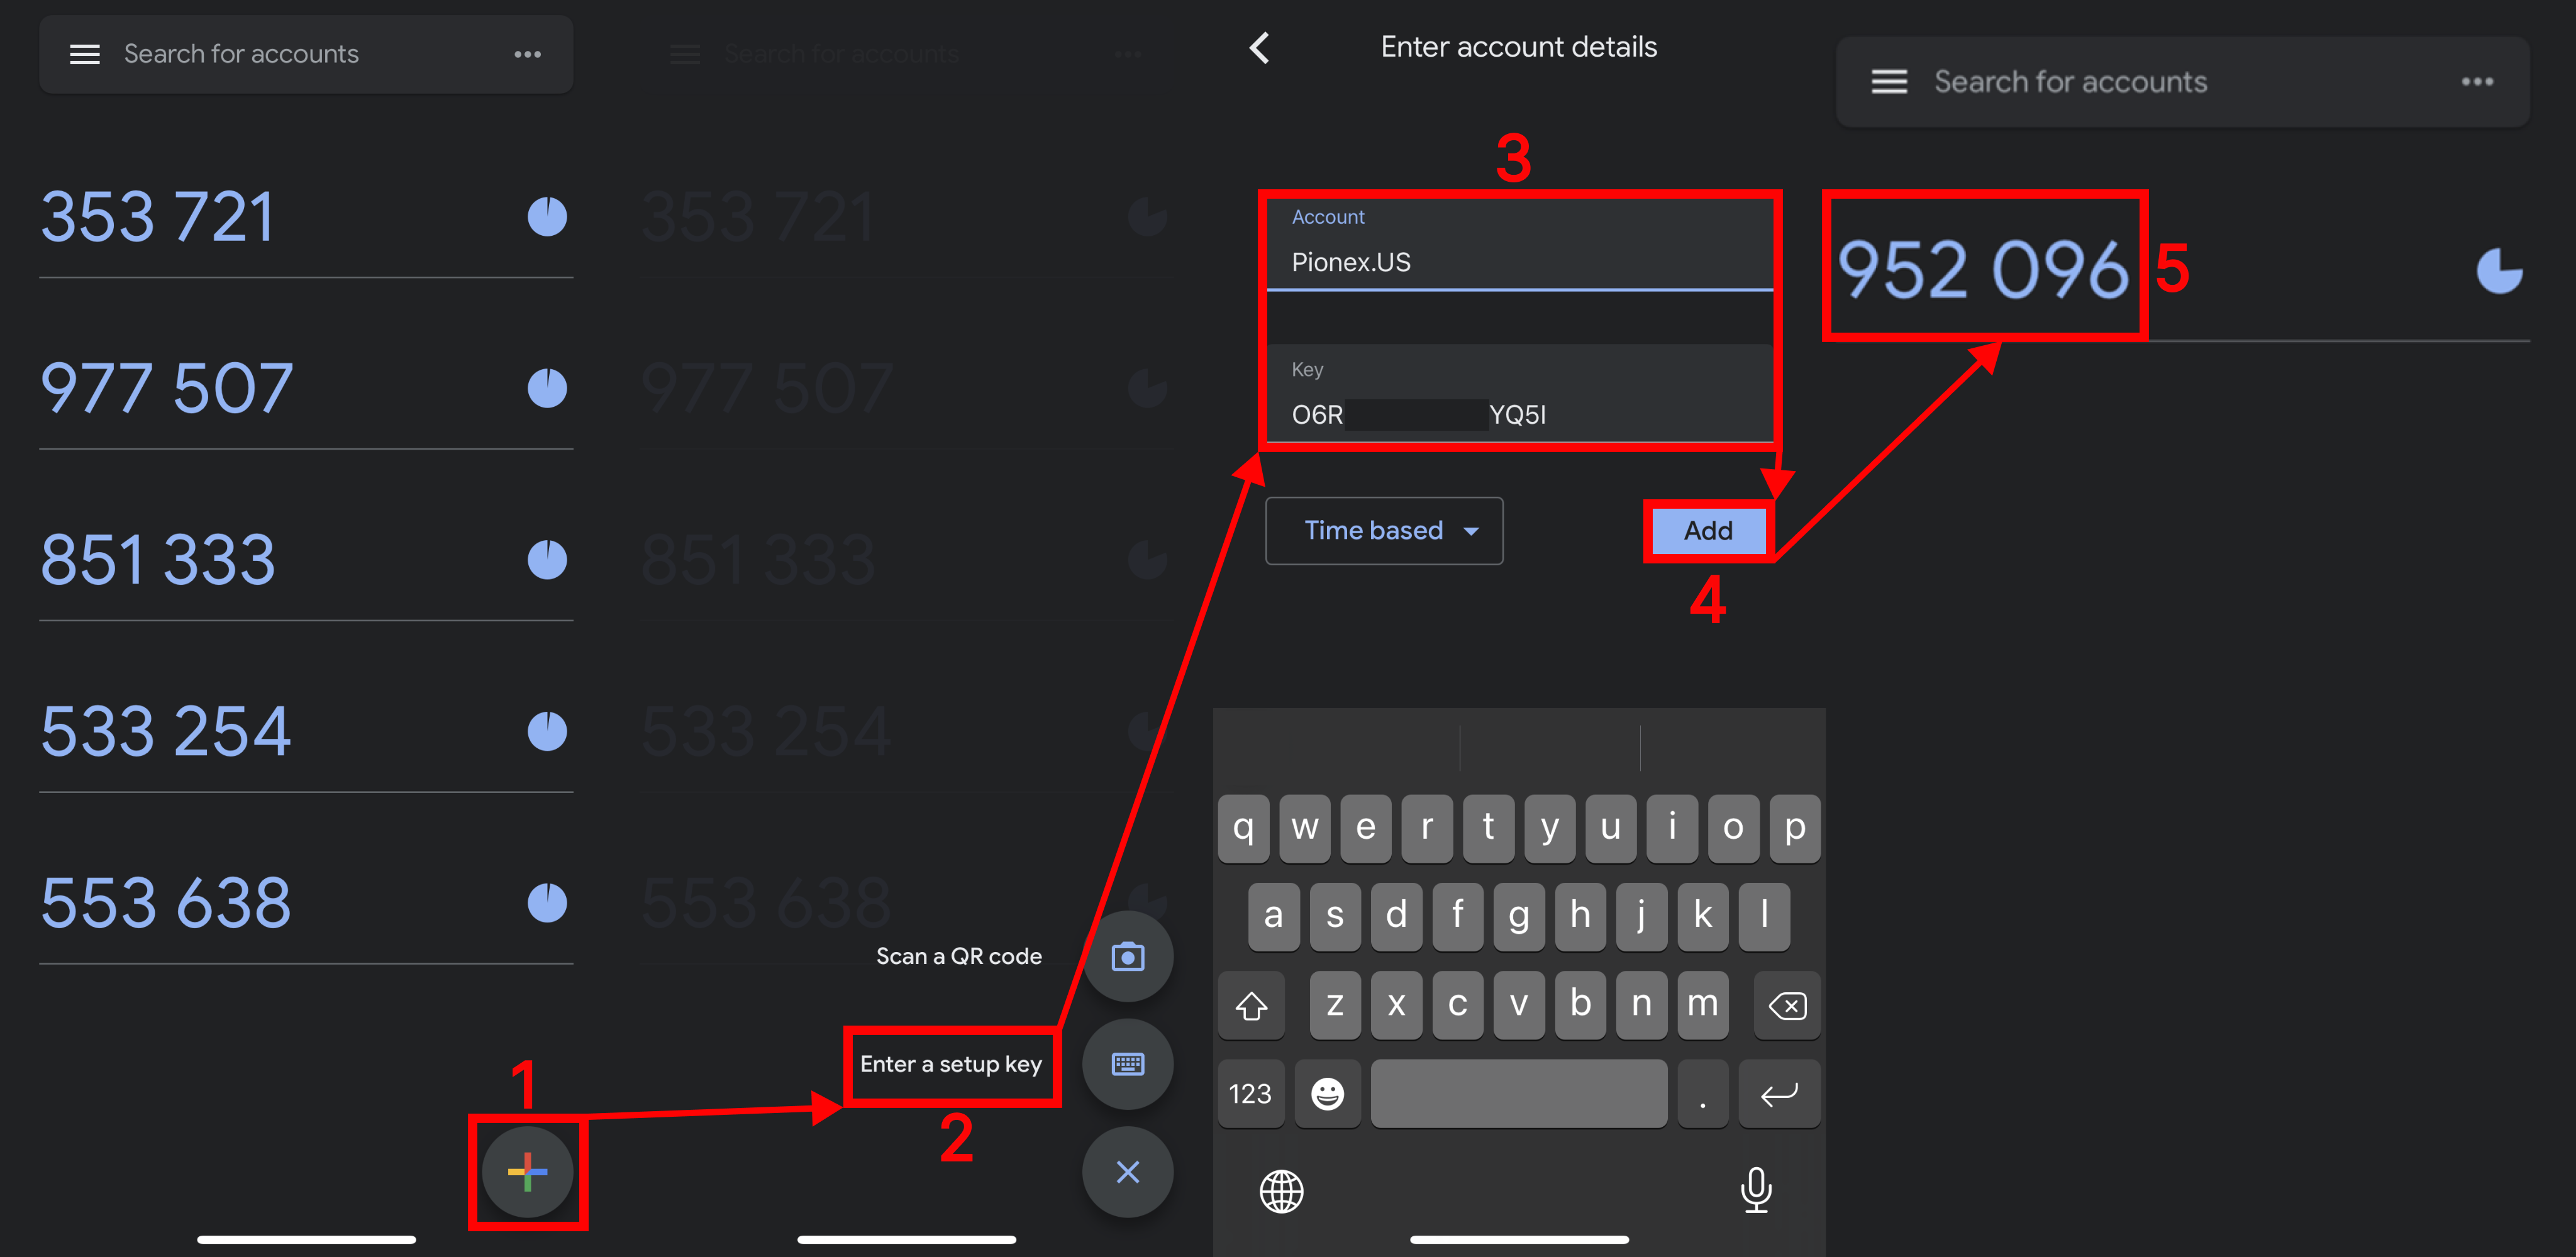
4. After you set up, Google Authenticator will generate a six-digit code for you (this code will be refreshed every 30 seconds); please enter the code into your Pionex.US App within the validity period of the code Authenticator binding page; your Google Authenticator is now successfully bound.
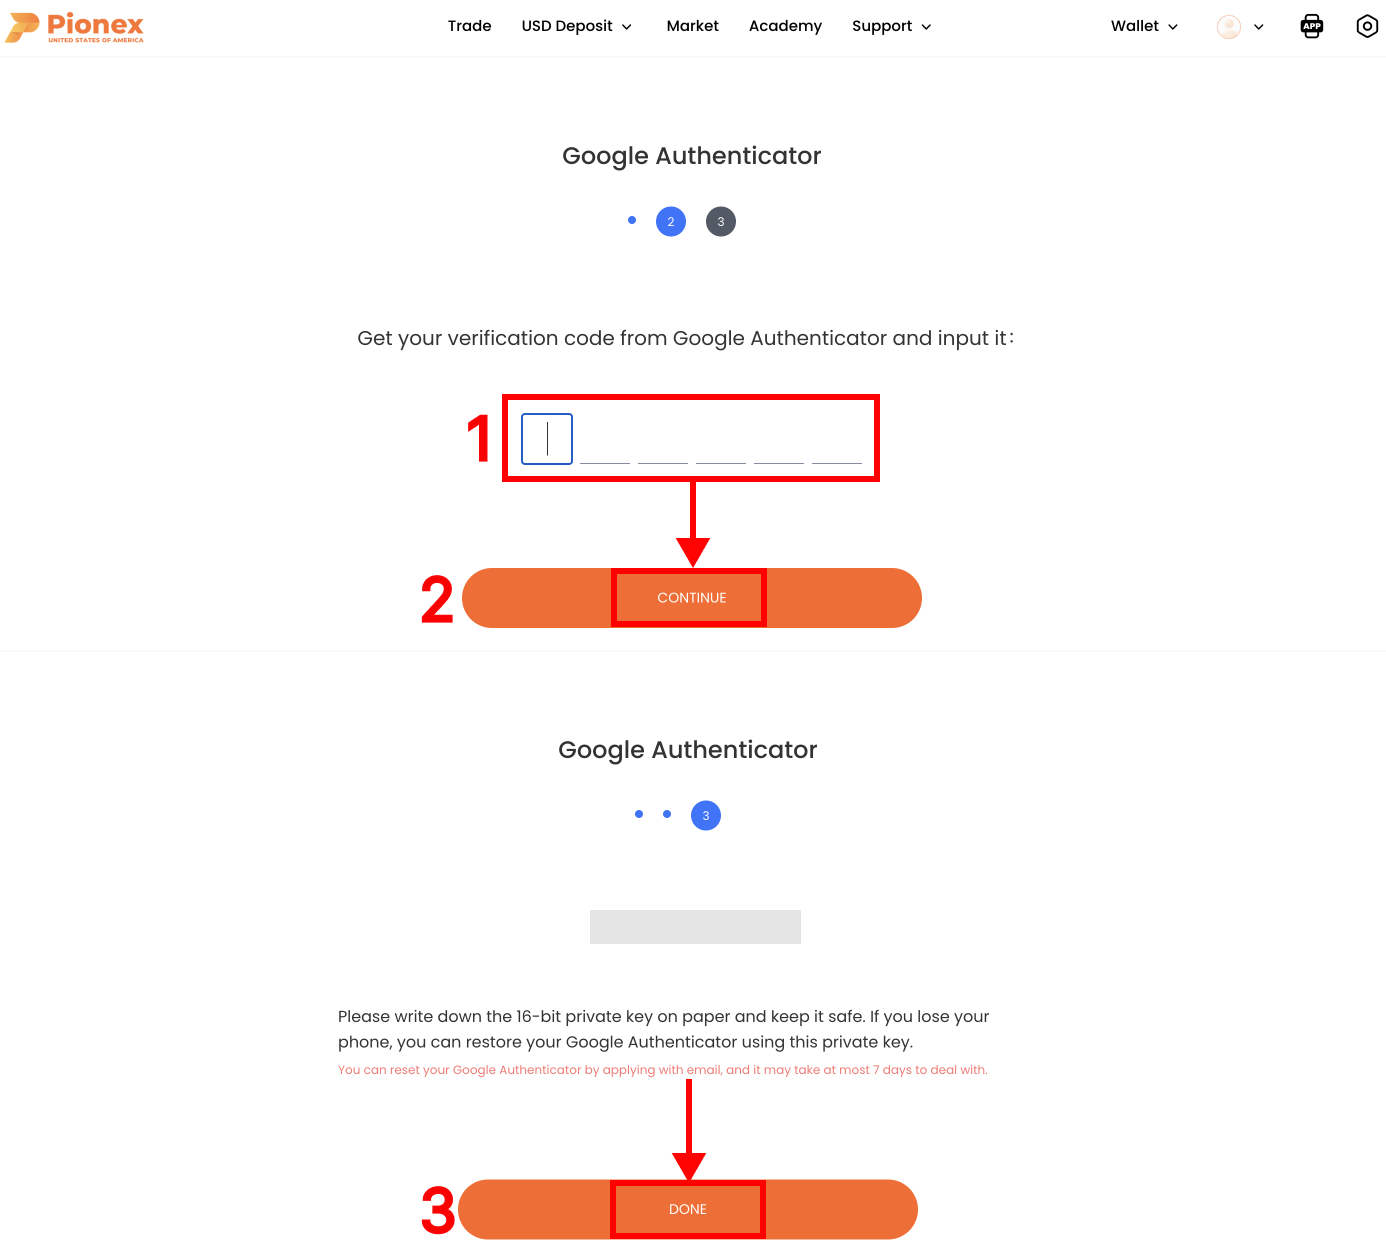
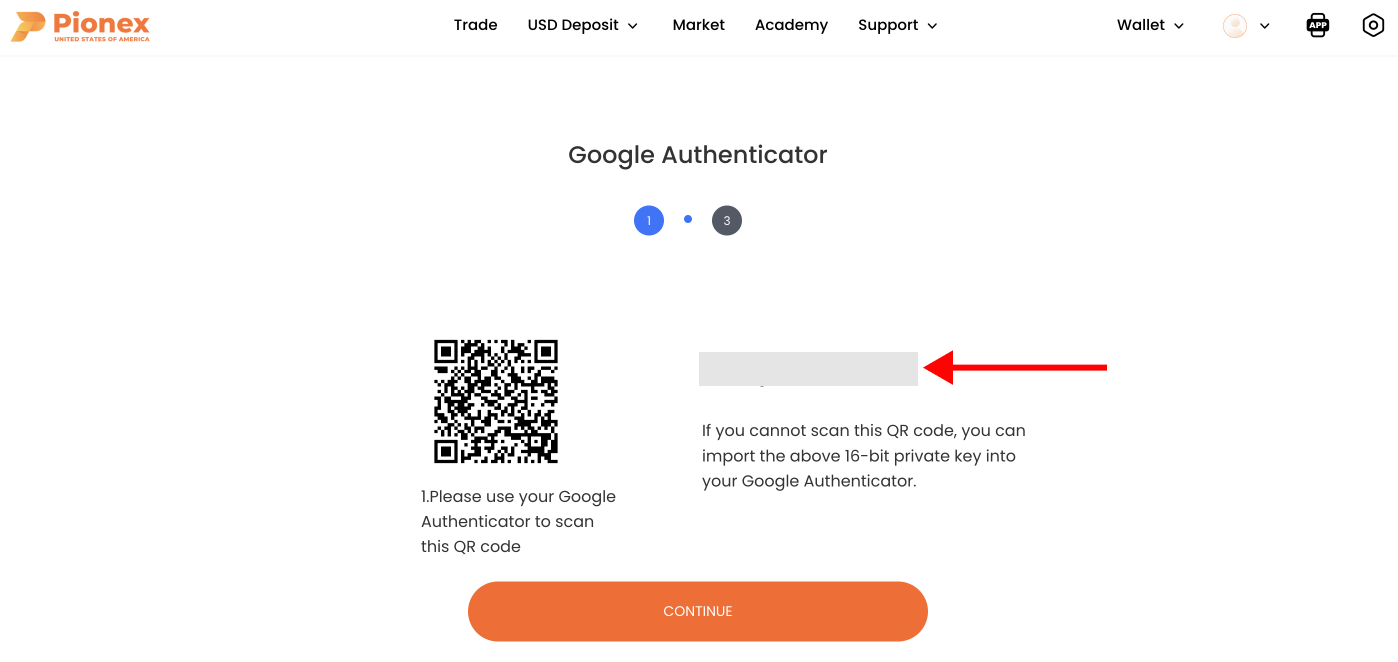
Web operation step
1. Click the buttons in the order shown in the picture to enter the Google Authenticator binding page.
2. Copy the private key (16-digit number) in the webpage, and then copy and paste the private key (16-digit number) into Google Authenticator according to step 3 in the App operation process to generate the corresponding six-digit password.
3. Fill in the generated six-digit code into the webpage to complete the binding of Google Authenticator.